
The Assignment: Create a kinetic sculpture using a variety of materials, joints, and circuitry
Materials:
My Project:
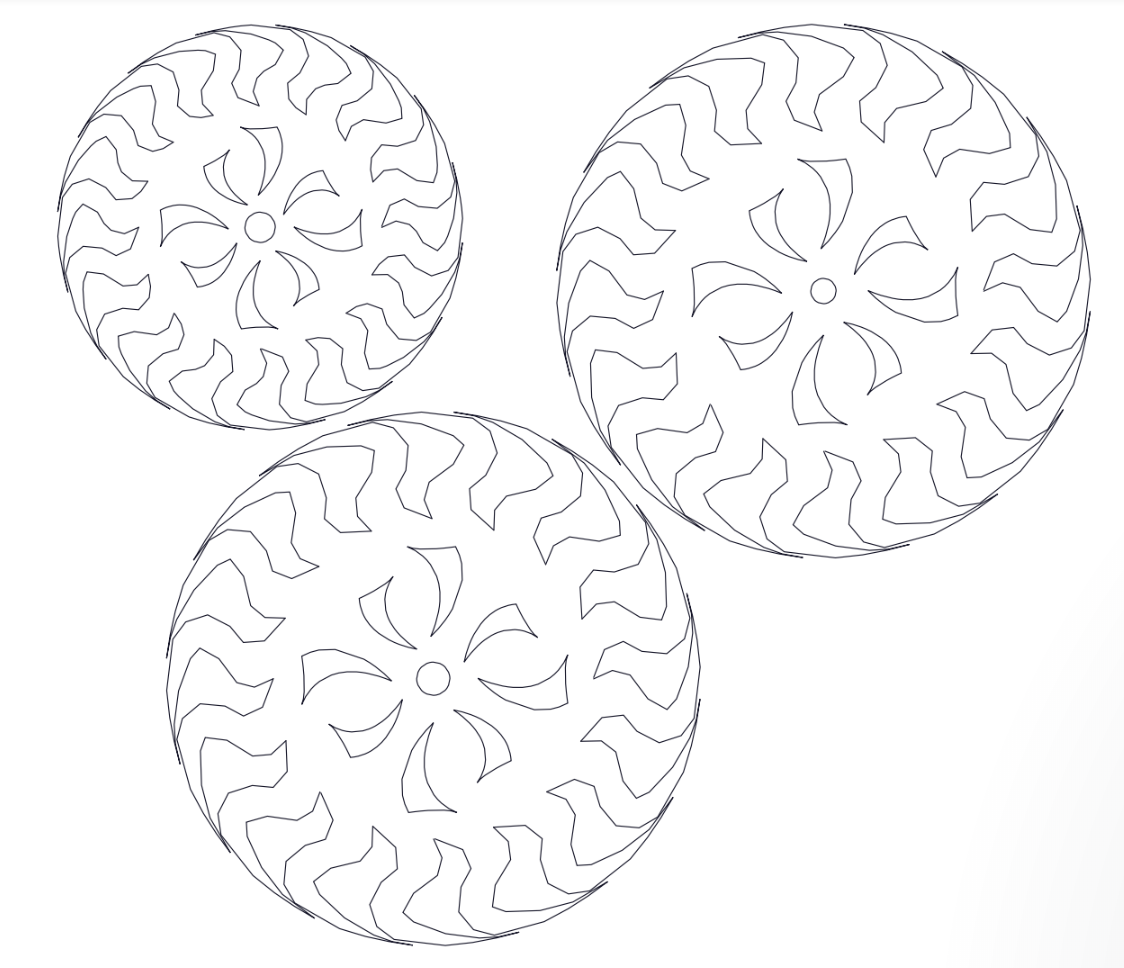
I started my project by looking at the work of Jennifer Townley and considering which shapes I could laser cut to form interesting shapes as they rotate. After playing around a bit in Fusion 360, I moved over to Adobe Illustrator so I could make some shapes with more odd curvatures. I ended up designing the following wheels:
My biggest challenge for the project was getting the two sets of wheels to spin in opposite directions. Because the wheels needed to be on the same axis, I ended up using two central axes: one thinner wooden dowel and one thicker, hollow metal dowel. Each wheel then needed an accordingly different central hole such that it could fit the wider dowel (other than the wide gear at top that was solely affixed to the wooden dowel.)
Next, I laser cut the shapes, cut the dowels down to 8.5 (wood) and 7.5 (metal) inches each using a hack saw. I then affixed the wheels to their respective dowels using a glue gun, ensuring that the wide radius wheels were not attached to the metal rod (as their rotation should be driven by the wooden dowel.
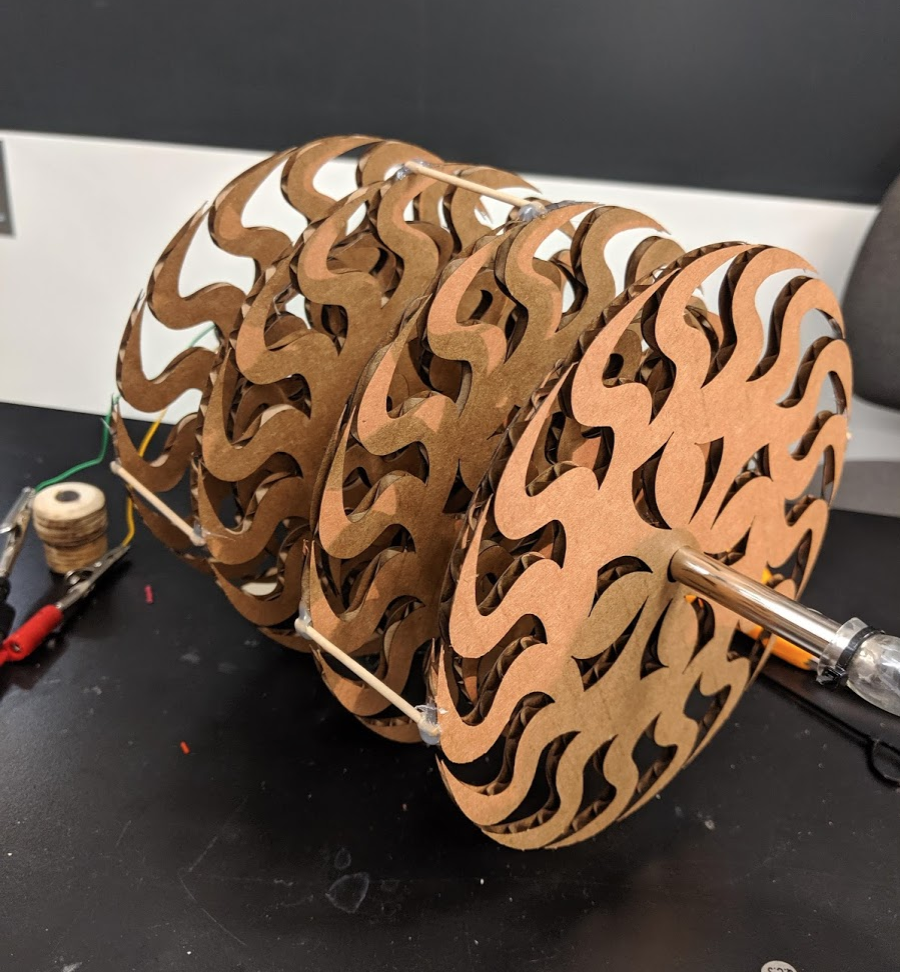
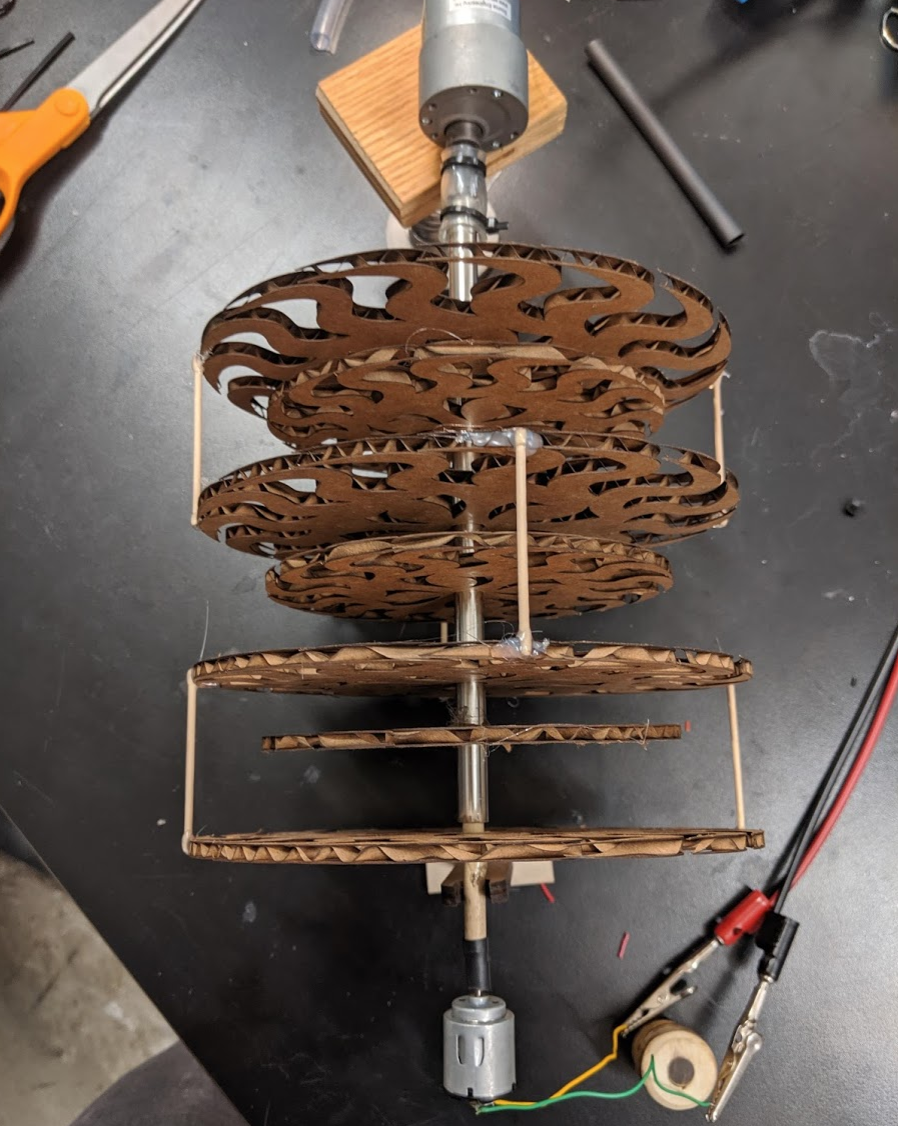
After adhering the wheels, I attached the wide radius wheels to each other using skewers and the glue gun, ensuring each was 2 inches apart. Finally, I needed to power my project! To do this, I soldered two geared motors to either dowel/rod and laser cut a little stand to put my sculpture on. I had a bit of trouble controlling motor speed as you’ll see in the video below, but at least I was able to get the wheel sets spinning on opposite axes.
Challenges & Workarounds:
Final Product: