
The Assignment: Choose an output device that you have not used before. Program a microcontroller to operate it.
Materials:
My Project:
For this week, I wanted to get a handle on manipulating multiple aspects of my chosen output device: the Neopixel LED strip. From an easy user interface perspective, I wanted to see if I could collapse multiple output adjustment functions into the use of a singular input device: the potentiometer.
First, I needed to get a reading from the potentiometer to affect the workings of an output device. To do this, I followed the course’s servo motor tutorial (found here). I used the following code to get the input from the potentiometer to affect the motor propeller position:
        #include
        Servo myservo;  // create servo object to control a servo

        int pos = 0;    // variable to store the servo position

        void setup() {
          myservo.attach(9);  // attaches the servo on pin 9 to the servo object
        }

        void loop() {
          for (pos = 0; pos <= 180; pos += 1) { // goes from 0 degrees to 180 degrees
            // in steps of 1 degree
            myservo.write(pos);              // tell servo to go to position in variable 'pos'
            delay(15);                       // waits 15ms for the servo to reach the position
          }
          myservo.write(0);					// send the servo back to 0
          delay(1000);						// give it enough time to make it there
        }
The circuit I used to operate this motor can be found below:
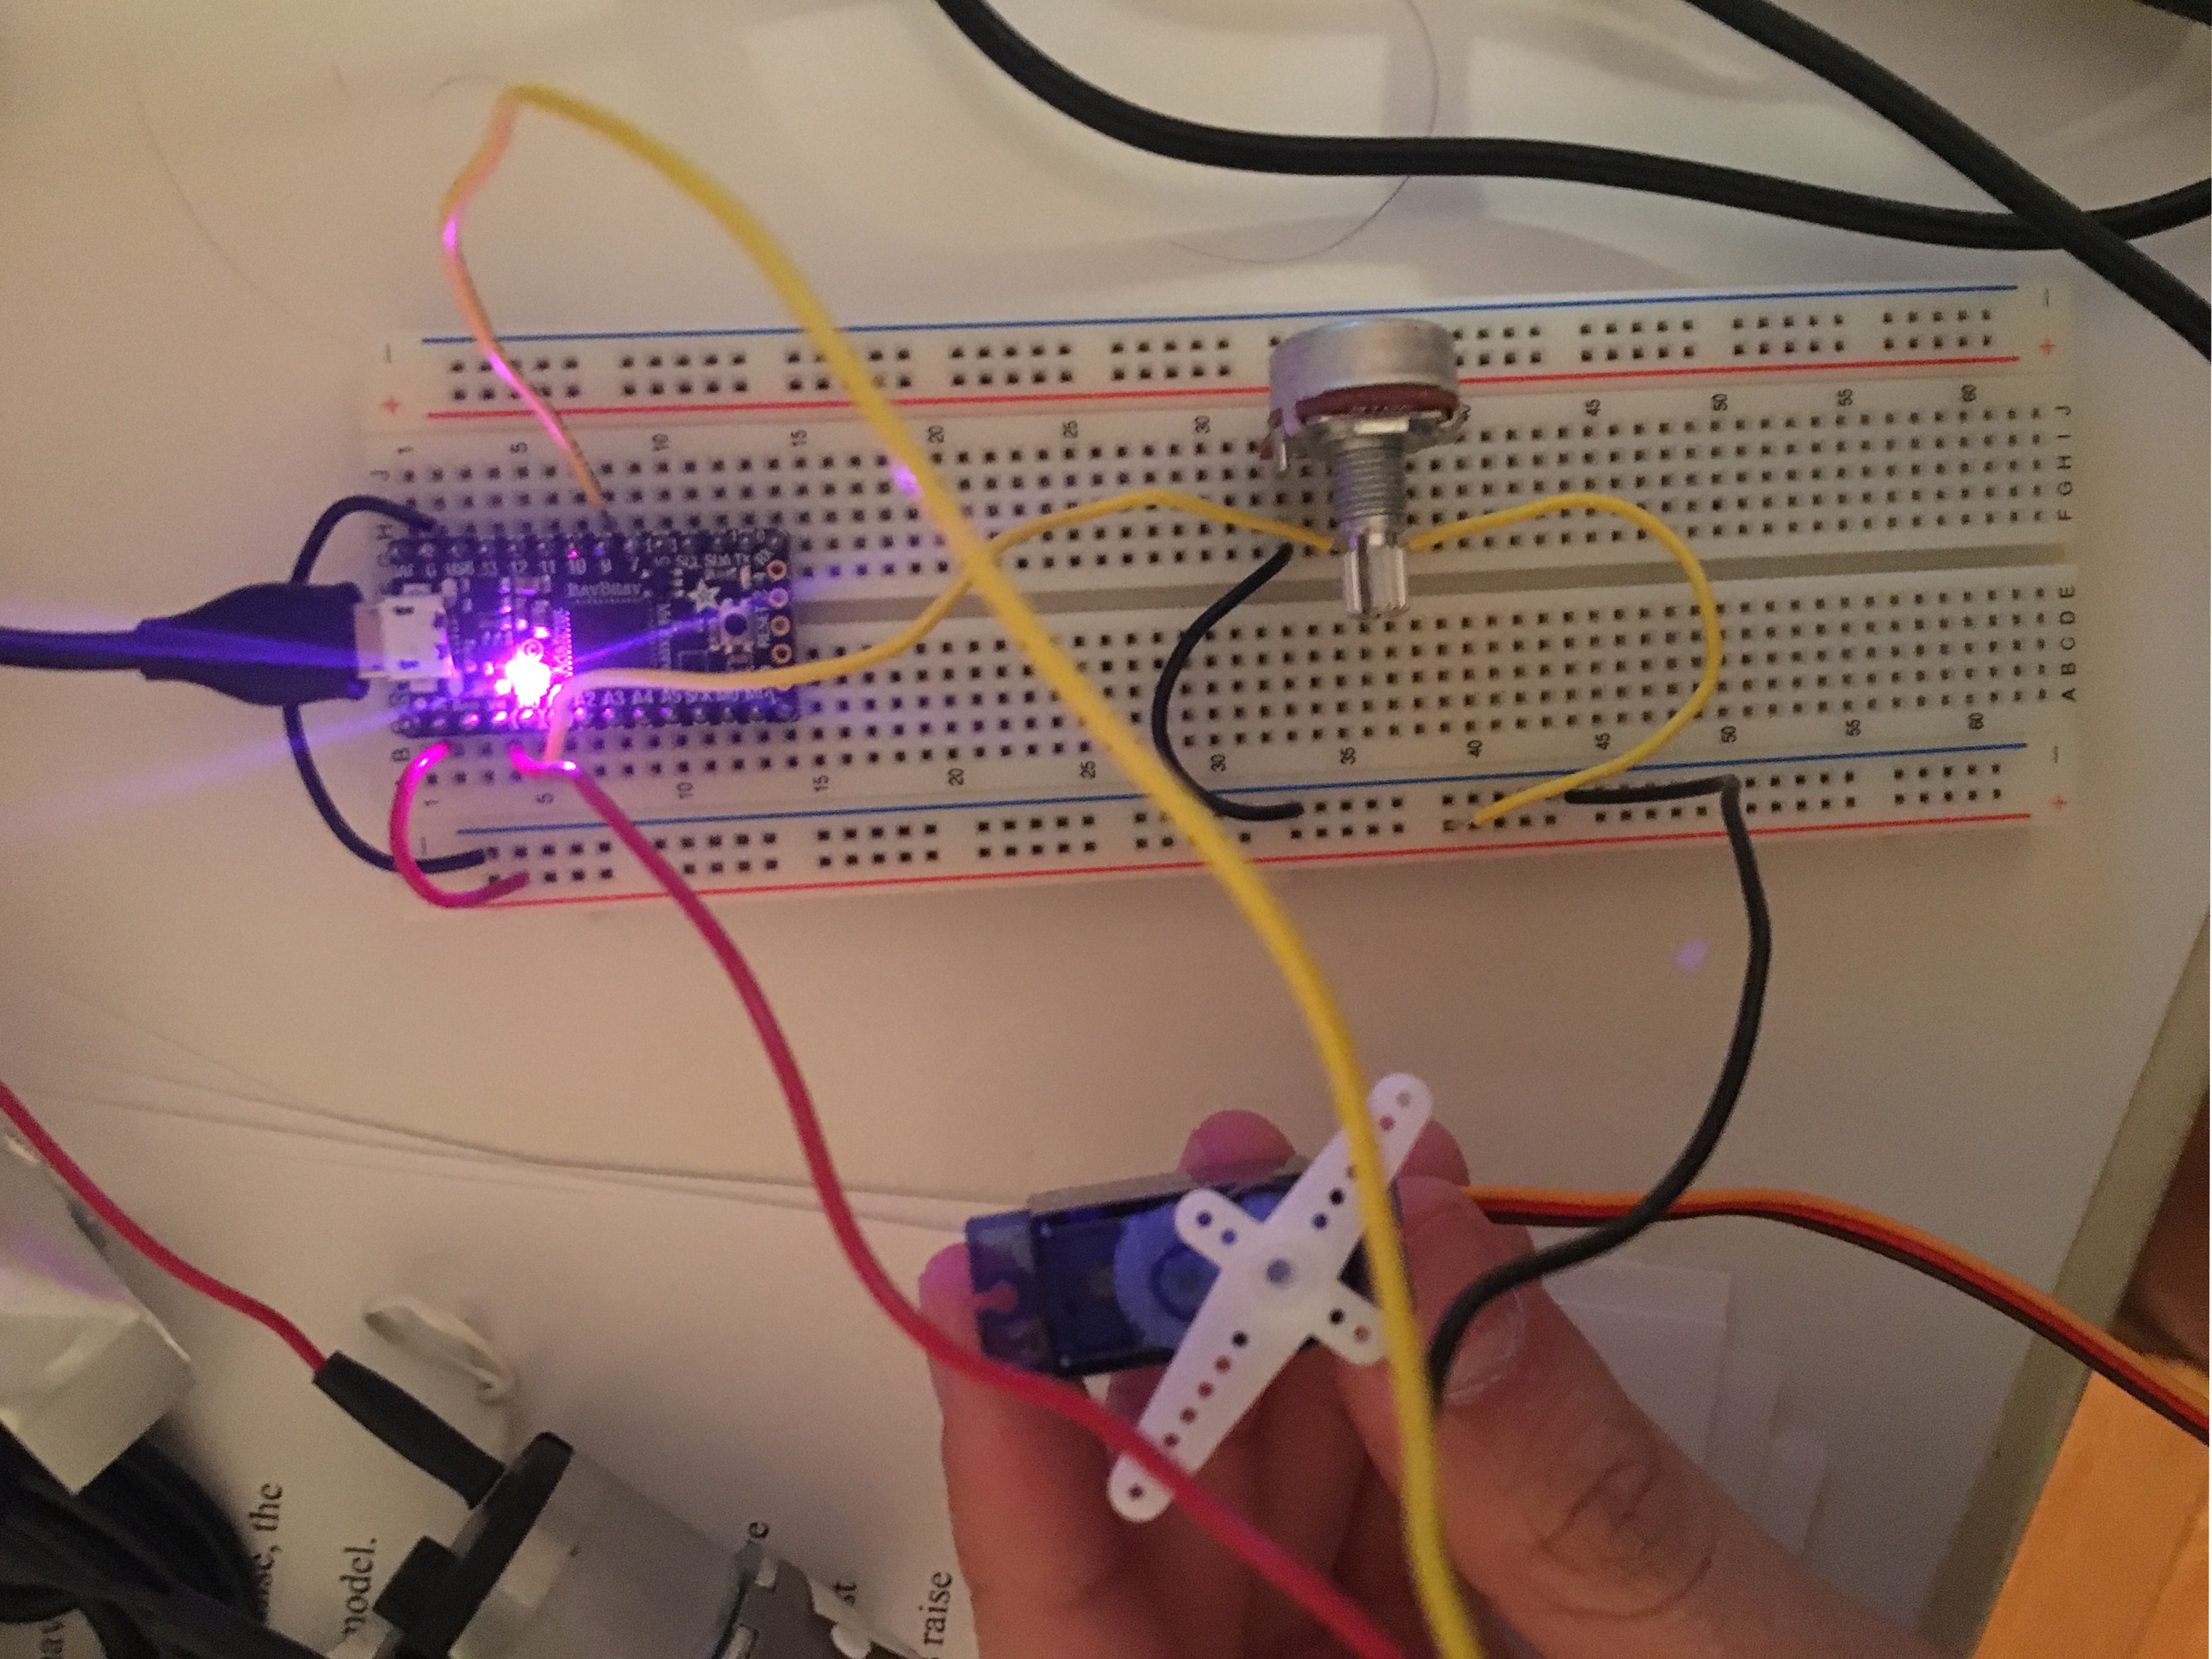
Once I got the servo motor up and running, my next task was getting the potentiometer to affect the LED light strip. The most crucial difference between this example and the servo motor example was changing the map function so that the input was properly scaled to the RGB color space. I wrote some code so the potentiometer affected the level of green in the RGB light.
Next, I wanted to create a function that would allow me to cycle through inputs for my three primary output adjustments: hue, brightness, and number of lights. To do this, I added a button circuit and created a variable to store which of the three variables I was changing at a given time. An example of the button circuit can be found in my Week 4 documentation. The code I wrote scales the variable input of the potentiometer into different variables which then affect the outputs of the light strip.
After that, It was challenging to convert a linear input to the output of a hue because the Neopixel uses a 3 dimensional color space (RGB). However, I was able to find a function called “Wheel()” in the documentation of the Neopixel that converts an integer between 0 and 255 to a hue. The full code of my project can be found below, along with an example of the board’s use:
      // Developed from the NeoPixel Ring simple sketch (c) 2013 Shae Erisson

      #include

      // Which pin on the Arduino is connected to the NeoPixels?
      #define PIN        9 // On Trinket or Gemma, suggest changing this to 1

      // How many NeoPixels are attached to the Arduino?
      #define NUMPIXELS 10 // Popular NeoPixel ring size
      Adafruit_NeoPixel pixels(NUMPIXELS, PIN, NEO_GRB + NEO_KHZ800);
      #define DELAYVAL 20 // Time (in milliseconds) to pause between pixels

      int potpin = 0;  // analog pin used to connect the potentiometer
      int val;    // variable to read the value from the analog pin
      const int buttonPin = 2;     // the number of the pushbutton pin
      int buttonState = 0;         // variable for reading the pushbutton status
      int type = 0;
      int val1;
      int val2;
      int val3;

      void setup() {
        // END of Trinket-specific code.
        Serial.begin(9600);
        pixels.begin(); // INITIALIZE NeoPixel strip object (REQUIRED)
        pinMode(buttonPin, INPUT);

      }

      void loop() {
        val = analogRead(potpin);            // reads the value of the potentiometer (value between 0 and 1023)
        if (type == 0) {
            val1 = map(val, 0, 1023, 0, 255);
        }
        if (type == 1) {
          // turn LED on:
            val2 = map(val, 0, 1023, 0, 255);
        }
        if (type == 2) {
          // turn LED on:
            pixels.clear(); // Set all pixel colors to 'off'
            val3 = map(val, 0, 1023, 0, 10);
        }
        delay(15);
        buttonState = digitalRead(buttonPin);
        if (buttonState == HIGH) {
          // turn LED on:
            Serial.println("BUTTON PRESSED");
            type += 1;
        }
        if (type > 2) {
          // turn LED on:
            type = 0;
        }

        // The first NeoPixel in a strand is #0, second is 1, all the way up
        // to the count of pixels minus one.
        for(int i=0; i